Sunday 17 November 2013

Final Submission: Assignment 2


Trailer


Five Sample Images

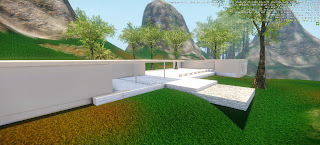
Medium scale high view showing the entire site.

View of the front pool in the Barcelona Pavilion

View showing signs of previous Human existence and signs of how humans became extinct

Graffiti showing signs of human existence.
The pool with a tag saying 'No Escape' The signs that Humans are the cause of it's own extintion.

Another high view of the site showing the deterioration of the site but contrasted with the growing green trees further back as a sign of hope.
A Dragon Ball from 'Dragon Ball Z' A symbol of hope no matter what kind of disasters we face.


Monday 28 October 2013

Experiment 2: Week 4 Reflection

This weeks lecture focused on how we would be able to improve our environment and tips on how to make our building have more character. Russel showed us a technique of how to paint on our materials possibly to deliver a message and give the the audience the sign of how life did exist in this environment before. The lecture has definitely given me ideas about the story I'm going to tell for my 2 minute trailer. With the lecture today I should be able to portray my ideas perfectly.

References for Trailer

I am Legend Trailer

I am Legend Trailer

Book of Eli

District 9


Blending Test

Sunday 20 October 2013

Tuesday 15 October 2013

Experiment 2: Week 3 Reflection

This weeks lecture we emphasized on the idea of abandonment. We were given examples of structures and environments that have been abandoned. It gave me a lot of ideas of how human existence affects a building and what occurs once humans do not exist anymore. Good examples that I took great note of was the nuclear zone in Chernobyl. This particular one interested me most because of the strong presence of human existence and the idea that anything can happen to any place in the world.

Progress and Direction of Project

Direction of Project

The direction of the project is heading towards a continuation from the previous trailer in Experiment 1. The end of Experiment 1 showed things not occurring the way you'd expect and certain things getting damaged due to this. What is doing the damage is still unknown. 
The chosen building is the house at the Barcelona Pavilion  I intentionally chose this because its fascinating structural features. I chose this to complement my general story that no place is safe from the destruction of what ever it may be, even in a place of great tranquility such as the Barcelona Pavilion.

Monday 14 October 2013

3 Sketches and Reference Images

Barcelona Pavilion


First sketch. Rear pool.


Second sketch. Outdoor view.


Indoor view. 


Thursday 10 October 2013

Experiment 2: Week 2 Reflection

Week 2 of experiment 2 we studied about the forensics of construction. We analysed some construction details and photo graphs of destructed buildings. This gave us an insight on how these structures are damage and how they would slowly deteriorate. We studied different kinds of damage such as water damage, earthquake damage, controlled damage and many more. Depending on the construction we can analyse the way the building is damaged and what remains. We were presented with details of construction for all three houses to help us understand what is supporting the building. By understanding this we also get an understanding of what parts of the building will be damaged first. The images presented also showed plenty close up images, giving us an idea of the materials which then leads us to discovering what materials will be deteriorate first.

Materials Research

Concrete

Concrete has great compressive strength but quite poor tensile strength. This means that it is difficult to crush concrete but easier to pull it apart. This is why structural concrete requires steel reinforcement. Concrete has a very low thermal  differentiation between hot and cold but in extreme conditions and if not calculated properly cracks may appear and effect the strength quite drastically. Concretes low thermal coefficient is why it is used as a barrier to protect steel frame structures from fires.

Cracking of concrete is will happen to all concrete to a certain extent. Some causes of concrete cracking are from shrinkage and tension. Even though concrete is prone to cracking there is a technique called creeping which allows the concrete to give in a little and reduce the the cracking, this technique must be calculated quite carefully.

Accessed from http://en.wikipedia.org/wiki/Properties_of_concrete on the 20th October 2013


Marble

Marble is an extremely hard metamorphic stone which is used in construction both cosmetically and structurally. Its is a re-crystalisation of limestone from geological processes. 

Natural processes have a degrading of its appearance and its structural strength. Agents such as rain, snow, thermal, wind and pollution all have an affect on marble. The weathering process makes marble lose its polish and detailing. Little can be done to restore this issue. Marble is also susceptible to erosion as it is a natural stone. The efects of erosion are general loss of detail, sharpness and the erosion is generally localised to the effected area of contact from wind or what ever it may be.

Discolouration of marble or staining can be caused by a variety of exterior substances, internal occlusions and structural elements. These things may include oil and grease stains, dyes and inks, organic stains, dirt stains and metallic stains.

Accessed from http://www.gsa.gov/portal/content/111858 on the 20th October 2013

Glass

Glass is generally known as a fragile material. It is composed of mainly sand, soda ashes and limestone heated to an extreme tempurature and then quickly cooled to create glass. It is a clear material used to let in natural light and is generally not used as a structural component.

As soon as the structural components of the building is damaged I would imagine that the glass will just simply crack and crumble. Moss and fog also attach it self to glass and create a type of staining of the glass. Glass could also be stained by natural dirt and grease and almost anything due to its transparency.

Accessed from http://www.ask.com/question/what-are-the-properties-of-glass on the 20th October 2013

Modelling Progress

This is what I have accomplished so far from modelling in 3ds Max. The components have transferred correctly to CryEngine. I need to fix up the UV mapping of the textures but apart from that everything is going quite smoothly.


Before and After of bump mapping

Before spec map and bump map was placed

After spec and bump map were placed. Unfortunately unable to see too much detail because the image is quite detailed but the process was successful.
Material successfully modified in the materials editor

Monday 7 October 2013

Experiment 2: Week 1 Reflection

The introduction of this experiment was for us to understand that, by breaking down a structure you learn more about the structure. You learn about how it was built and what are its weak points. It also gives us an insight on the materials and how different materials break down which then leads to structure failure. This experiments would be very interesting and would be very useful skill to utilize in our everyday lives.

3 Houses Exported to CryEngine

Experiment 2: Exported object from 3ds Max to CryEngine


An exported object from 3ds max to CryEngine. Encountered some difficulty getting the textures to work and also transferring from new versions of both 3ds max and CryEngine. Repeated the process a few times to finally get it to work and understand the process.

Monday 16 September 2013

Experiment 1


Week 5 Reflection

From this lecture I learnt that subliminal messaging can be both very obvious and very discrete. The path I chose to use for my project was a combination of both. I used techniques such as decals and textures to achieve this and I also used basic numbers of certain objects to portray part of the combination. Subtle things such as the numbers of clouds in a scene. I attempted a few options with shadows but I was unsuccessful. The lecture has shown me the effectiveness of subliminal messaging and how you must carefully analyse things to truly understand their meaning.

The Subliminal


The Number Letter Combination: E & 7

Combination on a macro scale 

Hidden combination on a micro scale
Hidden letter and number combination in a discrete view.
The same area as the above image but a more obvious view of the letter and number combination
The combination hidden on the mountain face by using texture.
A more obvious perspective of the above image.
This image is hidden in one of the frames in the trailer.

The Sublime: Weather & Week 4 Reflection

Weather

Stranded island with an approaching storm

Escape from the deserted island towards the island where you'd have a higher chance of surviving.

Week 4 Reflection

This weeks lecture we learnt about the sublime. We learnt about incorporating an awe inspiring environment within our island, something that the audience would view in amazement. The inspiration for my sublime environment is The Great Blue Hole in the Belize. This particular environment really inspired me as my level was an island based level and incorporating The Great Blue Hole into my island was a perfect blend of the theme. 

Sunday 15 September 2013

The Sublime: Atmosphere

Before and After

Before and after screenshots of an area within the level. The night overcast image was used for this particular screen shot.

Before (bottom) After (top) Evening sky and default sky, comparison.

Before (bottom) After (top)  Early morning sky

Monday 9 September 2013

CryEngine The Sublime

Sublime screenshot taken from CryEngine. Interpretation on 'The Big Hole'
Screen shot with clouds (1)

Screen shot with clouds (2)

Tuesday 27 August 2013

The Sublime: Reference Image

The Great Blue Hole - Belize

I chose this image as a reference for 'The Sublime because it has a great relation to my own island and ideas. I have intended to create a sublime environment for a tropical environment and a dark, gloomy environment, on the same island. I plan to separate these environments with mountains. Intended to give the viewer a feeling of both extremes.

Week 3 Reflection

The Picturesque

In week 3's lecture we examined the picturesque. The picturesque is intended to create an immersing feeling for the viewer by using a foreground, middle ground and a background. Using these three assets we had to create a meaningful and interesting scene.

For my particular project I would have to immerse the viewer into a scene of paradise, pure beauty and a sense of relaxation. While doing this I would also have to create a lonely and desperation scene, as I intend to give the viewer a sense of trying to search for a better place and a sense of desperation during that search.

The examples shown in the lecture and the reference images that we were asked to search, will be a great help in giving us an detailed idea of the picturesque. 

Short Clip 1

The Picturesque: CryEngine Interpretations


Interpretations of 'The Picturesque'. With a foreground, middle ground and a background.

Monday 12 August 2013

Reflection Week 2

Week 2's lecture was about the real vs the unreal. It reflected on how we should pay attention to how objects act when put under certain conditions. Examples of this are noticing how light reflected of different surfaces and an interesting ways of observing how objects act under certain conditions would be destroying objects and seeing how they fall apart and change during the process.

This can put into relation to my work in the aspect of things such as weather and how certain objects would react to different conditions. Also lighting is another important aspect in my particular work because I intend to create both a scary, lonely environment and also a paradise.

Custom Terrain Applied to Island

Custom Texture Applied to Custom_Island1

Bird's-eye view of the texture. Can see the variation in colour of the same from using custom textures. A much more effective way of immersing the viewer into the scene. 

Close up of the sand texture applied along the coast. The variation in colour is noticeable but could be enhanced with further experimentation.


New Terrain Texture

Beach Sand


This is the custom texture I decided to use for my project. I chose this because it is going to be a main feature in my particular project so I wanted to make it look as interesting and detailed as possible. I hope to improve on the result that I have achieved so far.

3 Screenshots: Second Island

GeoControl Landscape w/GeoControl Texture